Fresh Roast SR500 Coffee Roaster Computer

General Discussions about DIY Modifications and other projects.
SteveS
Site Admin
Posts: 25
Joined: July 15th, 2010, 3:03 pm

Fresh Roast SR500 Coffee Roaster Computer

Post by SteveS »

I've been messing around with a Fresh Roast Coffee Roaster for many months now. I've noticed the lack of ability to control the roaster very accurately starting with the Fresh Roast Plus 8. Recently I got a SR500 and while it has more controls it has many limits still. As a result I began working on changing the roaster around to control it better.

At this time I am in development with the following

Development hardware:
  • PIC32 (PIC32MX795F512L) USB Starter Kit II - DM320003-2 ($55.00)
  • PIC32 I/O Expansion Board - DM320002 ($72.00)
  • Graphics PICtail Plus Daughter Board with 3.2 Display Kit - AC164127-3 ($154.99)
    • Graphics LCD Controller PICtail Plus SSD1926 Board - AC164127-5 ($69.99)
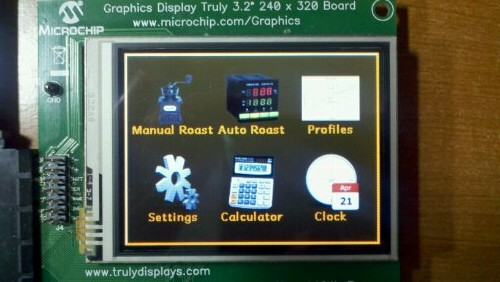
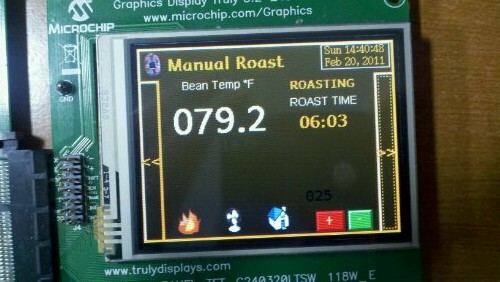
    • Graphics Display Truly 3.2" 240x320 Board with Touch Screen - AC1641217-4 ($99.99)
  • 9440 Breadboard w/ 350pc Jumper Wire Kit - ($39.99)
  • Prototype PICtail Plus Daughter Board - AC164126 ($20.00)
  • MAX6675 Single Thermocouple Interface Board - ($21.50)
  • Fast 100Mbps Ethernet PICtail Plus Daughter Board - AC164132 - ($49.99)
  • 2 15A Relay board - ($16.00)
  • DS1307 Breakout Board - ($14.95)
  • DS3234 RTC Breakout Board - ($19.95)
  • SHT1x Breakout Board - ($41.95)
  • BMP085 Breakout Board - ($19.95)
  • FT232R Breakout Board - ($14.95)
  • SD Memory Card Breakout Board - ($9.95)
  • MicroSD Memory Breakout Board - ($14.95)
  • TechToys SSD1963 Eval Board w/ 7 inch 800x480 touch screen display - Bundle SSD1963EVK-R3B + 7" WVGA color TFT with Touch Panel ($119.00)
  • Arduino Uno SMD - ($29.95)
  • Arduino Mega 2560 - ($58.95)
  • Arduino Ethernet Shield - ($45.95)
  • Crib for Arduino - ($29.95)
  • Ethernet Faceplate for Crib for Arduino - ($4.95)
  • 30A Non-Invasive Current Sensor - ($9.95)
  • Jack/Breakout for Current Sensor - ($2.45)
  • Breadboard Power Supply - ($9.95)
  • 10 pin ribbon crimp connector - Female (Qty 2) - ($1.00)
  • 15 foot roll 10 wire ribbon cable - ($4.95)
  • 100 pack 12" FF Jumper Wires - ($34.95)
  • 100 pack 12" MF Jumper Wires - ($34.95)
  • - ($xx.00)


Equipment/Tools:
  • Aoyue 968 SMD/SMT Hot Air 3 in1 Repair & Rework Station - ($149.99)
  • Aoyue 853A Quartz Infrared Preheating Station - ($105.00)
  • Spring-Arm Magnifier Desk Lamp 5x7 5-Diopter - ($79.90)
  • Open Workbench Logic Analyzer - ($xx.00)
  • SMD Tweezers - Straight - ($3.95)
  • SMD Tweezers - Curved - ($3.95)
  • Brass Sponge & Base - ($9.95)
  • - ($xx.00)
  • - ($xx.00)

Parts/Components/Consumables:
  • Lead Free No Clean Flux Solder Paste - ($16.00)
  • RTH03 Sensor - ($xx.00)
  • Mini Push Button Switches (Qty 7) - ($xx.00)
  • Rotary Potentiometer (Linear) (Qty 2) - ($xx.00)
  • - ($xx.00)
  • - ($xx.00)
  • - ($xx.00)
  • - ($xx.00)
  • - ($xx.00)
  • - ($xx.00)
  • - ($xx.00)
  • - ($xx.00)


  • More Coming Soon

Development Systems Investment: $946.07
Equipment/Tools Expense: $352.74
Prototype Parts/Components/Consumables Expense: $16.00

Total Expense (excluding taxes and shipping): $1,314.81


I will edit to update this list up here as I add equipment and explain more about the roaster in lower messages in the thread.

The final product will be PIC32 based but will occasionally use Arduino as a "verification aid" during development to ensure integrity of sensors and to offload inefficient processes off the main PIC32 until the code can be optimized. I prefer to make progress ensuring concepts work first rather than deal with efficiency and writing code from scratch to work in the PIC32 world. I seem to be pretty alone using some sensors connected to the PIC32 and quite alone using one to control a coffee roaster so this seems like the best compromise. Arduino has a lot of sample code and schematics to prove concepts (and communicate them via I2C, SPI, or UART/serial to the PIC32) and a large community of people controlling coffee roasters w/ Arduino. Once each of my ideas are proven sound I'll adjust voltages/wiring to connect directly to a PIC32 and figure out how to write the new code on PIC32 knowing it works with Arduino properly.
SteveS
Site Admin
Posts: 25
Joined: July 15th, 2010, 3:03 pm

Re: Fresh Roast SR500 Coffee Roaster Computer

Post by SteveS »

At first I started off with a Parallax Basic Stamp. Many people have used the Basic Stamp as a platform for their coffee roaster. I started off programming it to control temperature by flipping on and off various relays. Next I interfaced a 20x4 LCD to monitor the temperature coming from the thermocouple. Soon I was looking at PID control techniques and wanting to add additional temperature sources. As I added these features I was trying to figure out ways to log and export the data from the system and then I I found I had started to run out of variables in the program memory. After trying to swap variables in and out of temporary registers and break the programming into smaller modules I decided this was just too much of a pain in the ass. For those that want REALLY simple on/off control of the temperature you should look at Parallax's Solder Pot project. This is an excellent base to start to control a coffee roaster via relays by making manual adjustments with knobs to trigger the heat elements. You will need to look at other methods to control the fan speed involving "dimmer" functions, however.

After I progressed through my evaluations of what I wanted to do I began to realize that I needed to use something else for a processor. There were many other projects out there and ultimately the manufacturer that appeared to give more options with more sample code to learn from to me seemed to be Microchip with the PIC processor. I started this project simulating some PIC18 and PIC24 processors. Eventually I maxed out on what I could do simulating so I have begun purchasing development kits to build my own circuits to interface with the roaster. I decided to go ahead and do the PIC32 system due to the speed and functions that are possible with little or no extra parts vs the PIC18 and PIC24 when interfacing to LCD, Ethernet, USB, etc. In addition I have other projects that I am considering that make purchasing the development tools a good idea.

I will ultimately develop everything using a few development boards and some prototyping boards interfaced to the processor. Once this results in a working project I will then "reverse engineer" everything that I am actively using on the development systems. This information should then allow me to create a dedicated circuit board with a reasonable chance of success at having a working prototype. Following creation of a prototype circuit board I will then order any of the required individual components and solder it all together to create a standalone roaster computer.
trevithick
Green Bean
Posts: 3
Joined: September 17th, 2010, 6:58 pm

Re: Fresh Roast SR500 Coffee Roaster Computer

Post by trevithick »

I too have a Fresh Roast SR500 and bought it for the express purpose of using it as a test bed for automation before building a larger scale roaster that can roast up to one pound at a time.

How have you progressed with your PIC32? The PICs look like they are perhaps more of a professional level product with years on the market, but their prices, especially for their development software led me to begin my process using an Arduino. My electronic skills and my C programming experience are limited, but it looks like there are plenty of sketchs and libraries available to modify and produce working code for a development roaster. I like the fact that the arduino community shares their code, projects, and experiences.

I will have to use a multiplexer to handle the number of sensor elements I hope to use and may need to demux for enough output signals to drive the display, heater relays, and fan dimmer.

For the moment while I put my shopping list together and finalize design goals on the roaster, I am experimenting with the arduino and various sensors while playing with the coding.
SteveS
Site Admin
Posts: 25
Joined: July 15th, 2010, 3:03 pm

Re: Fresh Roast SR500 Coffee Roaster Computer

Post by SteveS »

I'm pretty happy with my SR500 and intend to use it as my primary home roaster when I'm done but I'm thinking about trying to build a couple bigger ones on my own for 1-5 lbs. I have an older Fresh Roast Plus 8 around that I'll probably wire into directly first when I start the control phase of things. When it gets closer to being "finished" I'll switch over to the SR500. Mainly I'm going to use the SR-500 for "data collection" initially with only sensors trying to learn to track what is happening in the roast while I control it manually. When it gets "smart" I'll have it start telling me what to do before I finally wire up the Plus 8 to let it take over until I'm sure it works.

Arduino's seem to be pretty good but I keep getting the feeling of "hobby" every time I start digging through them. I just get this weird feeling like I should be playing with the thermostat or blinking LEDs and controlling RC Airplanes with an Arduino every time I start looking at it.

The PIC32 has a pretty decent community too but for the most part the really high density pins results in less people working with it due to needing to learn Surface Mount soldering techniques etc. After a little practice I seem to have figured that out by watching a few YouTube videos and having procured some equipment mentioned above that works pretty well.

I'm going to need to work on figuring out what I'm going to do for making PCBs but for now the development kits and a few "eval board" kits I've come across are letting me test out designs without too much other work required. MOST of the kit stuff I'm using is actually from Arduino people's projects mostly. I've found most of the Arduino code is pretty helpful figuring out PIC32 since there is a tremendous amount of similarity.

Most of my skill with C was from years ago modifying "BBS" software and a quick class I had in High School. I've tended to learn best when looking at existing code and "reverse engineering" how it works. Unfortunately most of the PIC sites are full of people who think giving you a complete working set of code is "cheating" and you need to read manuals and other things to learn it. People often post lots of functions leaving out the function that actually calls all of those items to make it do whatever it is doing. At least I can understand what I'm looking at so I figure it out eventually.

I chose the PIC32 using the 100 pin chip due to the large amount of I2C and SPI ports on it as well as a plethora of GPIO left over and all its built in capabilities for USB, networking, etc. So far I've not been disappointed.

As of right now my status is I've banged away on this thing for months. I had run into a sort of roadblock getting the thermocouple running a long time back and discovered a conflict on the SPI1 connection that I didnt realize was there until just a few weeks ago. I've now moved ports up to SPI2 and INSTANTLY it started working with my code that had been changed many many times to what it is now. I'm pretty sure my initial code wouldn't have worked anyway though and I've learned quite a bit along the way.

I've now managed to take readings from the thermocouple and run them out to a LCD as a number and to scroll them in a graph. Right now I'm trying to get ambient conditions from an SHT15 and some other sensors. I've managed to get it to read the SHT and the results are erroneous but are clearly activating SOMETHING on the chip that is not being interpreted properly probably due to a timing issue on the clock. Once this is working my next step is to get SD Memory working and have it simply record the statistical data for analysis on the PC.
SteveS
Site Admin
Posts: 25
Joined: July 15th, 2010, 3:03 pm

Re: Fresh Roast SR500 Coffee Roaster Computer

Post by SteveS »

and... as of now I've managed to get the SHT15 to report temperature readings reliably back to back in a loop for several dozen hits and responded appropriately when warmth was applied etc and then when I rebooted the circuit after inserting a set of math to convert the reading to a real temperature number so I didnt have to manually do the math it went back to 65535. I did an undo, recompile, and program and nada. Still 65535.

Wheeeeee

I'm pretty sure this is some sort of timing issue but it could be an issue with the resistors too I suppose. I need to read more about the voltage I'm using vs the resistors on the bus and the length of wiring. I may be getting some sort of interference with all the gear on the desk right now.
SteveS
Site Admin
Posts: 25
Joined: July 15th, 2010, 3:03 pm

Re: Fresh Roast SR500 Coffee Roaster Computer

Post by SteveS »

Main Menu
There will be a couple minor tweaks to squeeze some extra stuff on this screen but pretty close to what it will end up being unless I come up with other ideas of other features to add and end up needing a new structure.
Image

Preliminary Roast Screen
Empty space to get more data fields and options to open up graphs, control bars, and other dials etc through a series of buttons. Bottom row to be reworked and left/right controls to be lowered down on the screen opening up more space for the graph.
Image

Preliminary Temperature Graphing Test
Temperatures able to be graphed from 50 degrees up through around 450-500 ish currently with the scaling formula I came up with to fit in the window. I need to nail that down better and then label the appropriate axis stuff.
Image
trevithick
Green Bean
Posts: 3
Joined: September 17th, 2010, 6:58 pm

Re: Fresh Roast SR500 Coffee Roaster Computer

Post by trevithick »

Hi Steve,

Your project is really moving along nicely and the display looks excellent and the plot looks right on. I've attached a screen shot of one of my roast's plot. I especially like the well designed graphics and the obvious thought that went into the options available.

My project is not nearly that far along, but I am working with someone to do the electronics and programming for me. We're using an Atmega processor versus a PIC. Make Magazine has an article in this quarters copy, "Why the Arduino Won and Why It’s Here to Stay" http://blog.makezine.com/archive/2011/02/why-the-arduino-won-and-why-its-here-to-stay.html, I am working on the mechanical design and component selection now and that's taking longer than I would like. Too many other things going on right now.

Where do you take your project next?

Mark
Attachments
Excel Template for plotting coffee roasts
Coffee Roasting Profile.jpg (209.01 KiB) Viewed 134874 times
SteveS
Site Admin
Posts: 25
Joined: July 15th, 2010, 3:03 pm

Re: Fresh Roast SR500 Coffee Roaster Computer

Post by SteveS »

Yikes, looks like I missed the fact that you posted to approve it. I tried to make it where you could post without approval last time and it didnt work. I kept looking back not seeing any follow up until I clicked the message today. I think I fixed it this time. I can probably change that approval requirement across the forum now, actually. I found a method to make the site pretty difficult for spammers to get through the registration process so I get a few hundred pages of logs of blocked spammers from Asian and Russian countries every week. I used to get about 50-100 spam messages in here a day so I had it where new users couldn't post without a moderator to activate their post.

Wish it was more popular with people making coffee roasters and roast controllers and all that instead of just the pharmaceutical spammers. I'll probably attract some attention once I get actual roasting being controlled by the system and a few videos posted of it etc. For now it's more "pretty" than functional unfortunately.

The Arduino looked like an interesting system to me. What I felt, however, was that it was mainly good for a limited sort of device and would need interfaced to a PC or laptop to give me what I was looking for. The Arduino tended to be a good system for converting sensor inputs to a stream of data that you could write to a memory stick or make it respond to. For it to get really graphical and generally be more advanced didn't (in my opinion) seem to work as well on the Arduino and would seem to require an interface to a PC to do things like Excel graphing etc. With a PIC it was going to be a lot more work (which is why I'm STILL banging my head on this) but tended to give a much more powerful self-contained system being possible.

I've never had to design anything on a microcontroller before. If I >REALLY< didnt want to force myself to do this with a PIC and have self-imposed requirements to do Graphic LCD touch screen, ethernet, and a lot of different sensors that are going to need a lot of inputs and outputs then the Arduino would have been my next choice probably. I'm learning to program a microcontroller, learning about electronics and the circuits involved, and then of course trying to apply all that to coffee roasting so I've started with quite a bit of handicap. The article from Make points that out where with a few shields and an Arduino board most people can learn enough programming to make most projects people want to make without having to "become an engineer" with a huge pile of datasheets and books.

Anyway, my plan for my project was to add some ambient sensors for humidity, temperature, etc as well as an SD memory reader/writer. As of a couple days ago I got the SD memory wired to the system and did manage to get it to read/write to the SD memory when it was wired up by itself. I've run into a problem where it seems to "bump into" the thermocouple when they are both connected causing data conflicts even though the chip select isnt running on the thermocouple as far as I can tell. I'm thinking it is having some sort of SPI conflicts where the thermocouple just starts broadcasting on top of the SD memory even though the thermocouple chip select is not activated.

Goal is to get it to write the temperature data coming in with a time stamp to a text file on the SD memory that can be imported into excel to graph like your example. Once I get that regularly logging then I'll begin the phase of analyzing the data on the PC and using the results to come up with a "best practice" program on how to let it control itself while logging the results that I can stick up on the blog. Then I try to make it reproduce the same roast a few times.... then make a self contained way to change the programming any way I like.

THEN I'm going to try my hand at making my own roaster and hooking it up to that too so that I have different roasters to try to make it more "universal" between electric, gas, different sizes of roasting chambers, 6 minute roasters... 12-18 minute roasters... longer.... etc.
trevithick
Green Bean
Posts: 3
Joined: September 17th, 2010, 6:58 pm

Re: Fresh Roast SR500 Coffee Roaster Computer

Post by trevithick »

Hi Steve,

I certainly know what you mean about spammers. That's why I pay annually for my Spamcop service. They block 99% of it and I can still check the blocked messages and white list or black list held messages. If they would hang a few, maybe we could get rid of some of it.

Your project sounds very much like mine with the exception of microcontrollers. I have no prior experience with microcontrollers, and very little with electronics myself. I agree that the PIC has more to offer, but I'm looking at doing it inexpensively, yet with lots of features. I'm not sure what all my programmer will be able to ring out of it, but he has lots of experience.

I just started a new job and am in the process of moving so my time and efforts are elsewhere for right now. Hopefully I'll be able to jump back in and start doing more with it in a month or so.

Chat with you later.

Mark
SteveS
Site Admin
Posts: 25
Joined: July 15th, 2010, 3:03 pm

Re: Fresh Roast SR500 Coffee Roaster Computer

Post by SteveS »

Soo... the latest update... I had wired in the SD memory stick reader and had been testing it separate from the main roaster program. Generally I've found having "dedicated" programs to a particular sensor with the rest of the system wired on but not initialized has resulted in easier testing and troubleshooting. Once I manage to confirm it works without the other code running I at least have a reasonable assumption that it actually works and is wired properly. If I go too long not getting it to work I try to disconnect everything else and run it by itself.

So far I tend to find issues with the LCD interface / graphic chip / memory config chip to conflict with a particular pin here and there. If I can get it to work without the LCD boards attached it obviously has a much smaller number of pins to try to find a conflict with. Usually by the time I isolate the LCD away from the system I've managed to identify a pattern of example code out there that I've managed to understand all the variations and respective overlaps and techniques from the data sheets better and know I have code that has a 90% or better chance of running after days of debugging.

Anyway, I discovered a weird little conflict with two of the pins on the LCD with my SD stuff. If I ran it SD only it worked fine. As soon as I initialize the LCD with the SD attached then I had the LCD initialization freeze the system either while touching it or while it was drawing a menu. It took probably about 3 hours of looking at the schematic for the graphics board assembly to figure out which wires it was and then find some that were not being used already. Another thing that seemed weird to me is that I'm running the LCD with 8 bit communication and pins that would have been in the 16 bit mode seemed to cause conflicts when I would have assumed them to be "dormant" and not active. Not quite sure what is going on with that since I have not obtained the data sheet for the SSD1926 chip yet.

So after making a few adjustments to the wiring I got it up and writing to the SD with the LCD attached. This weekend I got it loaded inside the Coffee Roaster programming. I ran into a problem with a couple commands from the code I brought over that did some initializing that appears to have done something to the oscillator that I didnt notice. This resulting in a momentary "stream of gibberish" coming out the UART port that I was using for watching status of some of the code I was troubleshooting with. It seemed as if the system had a baud rate to the com port of the computer that suddenly "shifted" up and down a few times in the middle of the machine starting up and then returned to normal. After I removed some of the excess code from the init area it resumed working.

I then had to move the "write to SD" down through the startup past the time and date retrieval. This results in accurate time/date stamps on the file now that is written to the SD memory card. I then began to modify the SD demo write into a command that builds the buffer data using a sprintf template inserting date and time on a line separated by commas and a few sections (with 0.00's right now) for sensor data as well. I'm going to bundle the write commands up into a function so that I can insert it into roaster loop as a external function. Every time it samples the temperatures and other future sensors it will shove it into the call to the "write to SD" function and append to the file it creates during the initialization of a new roast loop.

I havent had much time to work on it this past week but probably tonight and tomorrow I'll get significantly closer to figuring that part out and probably test running the roaster with nothing in it just to get some temperaturee logging as it goes up/down for a few seconds and then exit the roast to close it to check the accuracy. Then when I'm sure that's working I'll try to do a regular roast with it out in the kitchen and see if I can get "good numbers" that I can post.

If I can get that working then the next step will be to get a "file management" function going to come up with names of files to make them unique and maybe let me load the data into the system to preview it on a graph on the PIC32 LCD as well as delete files. THEN I get to start figuring out how to program it to control things by itself based on my normal data. :D
Post Reply